Introduction
Welcome to another article which should be used for good, but can also be used for bad! Today we are going to talk about how to get into a Windows machine without a password!
Please note that the steps below are based on a few factors:
- We are going after the local account, not the Microsoft account of the machine. Windows 10 will generally ask you for a live account when you first configure the machine, this method will not work on these accounts.
- The device does not have drive encryption like BitLocker
- Physical access is required for this hack, it cannot be done remotely
If your target device hits the above criteria, then read on!
The Hack
This trick takes advantage of editing a utility (For this we will be using the osk.exe or On Screen Keyboard) which is accessible from the login screen and making this utility spawn a shell rather than the utility itself. The shell will open before any use account is logged in and will run as SYSTEM. This allows you to execute privileged commands to the device to create a new account and add that account to the local administrator group. The way that we achieve this is we are going to boot into either Windows PE or Kali Linux and change the utility exe to a command prompt exe.
In order to do this, we will need the following:
- A USB loaded with either Windows PE or Kali.
- Basic knowledge of using terminal in Kali (navigation of file systems)
- Physical access to the target machine
- Access to the BIOS and UEFI to change the boot order, or at least access to a one time boot of USB media.
For this guide, I used Kali.
Update: Kali can be downloaded from here: https://www.kali.org/ 9 I used Rufus (https://rufus.ie/ 2) to burn Kali to a USB Stick and configured options for persistence. I then ran Kali in Live Persistence mode.
Execution
Boot into the live version of Kali from your USB.
First, you want to list the different disks and volumes that you have available and locate your Windows machine. For me, mine was listed as “255GB Volume” when booting from a live USB with persistent Kali.
Bring up the terminal and navigate to the Windows “File System”, this will most likely be under the /media/root folder. Within the folder there will be a long string of numbers, navigate into that to access the Windows volume.
Once you have navigated to the windows directory (C:\ equivalent) on your terminal, navigate to /Windows/System32.
From the /media/root/3278d path, run the following command to get to the System32 folder:
cd Windows/System32/
We now want to rename the original/genuine osk.exe so we can reverse the changes later, so you will need to run the command:
mv osk.exe osk.exe.old
Your commands should look something like this:
Next, we want to rename cmd.exe (Command Prompt) to osk.exe, we do this by running the following command:
mv cmd.exe osk.exe
Your command should look something like the below, there isn’t any confirmation that the command has succeeded but this is fine.
To explain the logic here, when you press on screen keyboard on the login screen this launches osk.exe which is the on screen keyboard application within the ease of access utilities. But now, we have RENAMED cmd.exe to osk.exe, so launching the on screen keyboard will launch our renamed cmd.exe instead, launching a shell on the login screen. Seeing as no users are logged in, it will spawn as SYSTEM which has the equivalent ADMINISTRATOR privileges to run net user commands.
Shutdown Kali and reboot the machine to launch back into the target Windows Machine.
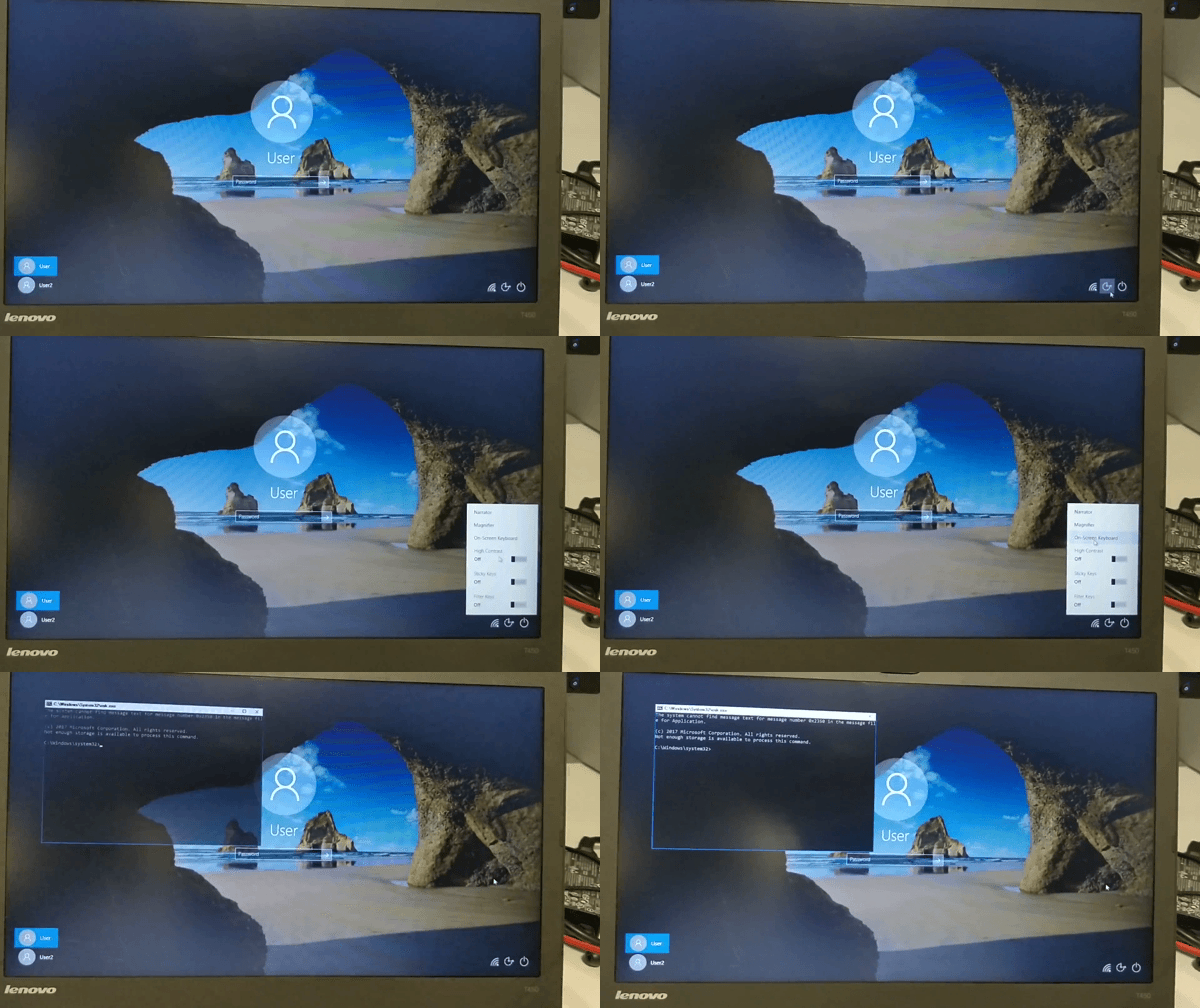
Once you are on the login screen, click on the ease of access button and launch the on screen keyboard, at which point a shell will spawn. I have made a GIF from my phone as I cannot take screenshots or record from the login page.

You can either reset the password of an existing user account, or you can create a new user with admin access.
Examples:
Resets an existing user account:
Command: net user [USERNAME] [PASSWORD]
Example: C:\windows\system32 net user “A.gennaro” p@55w0rd!
Create a new account and add admin privileges:
Command: net user [USERNAME] [PASSWORD] /add
Example: C:\windows\system32 net user A.gennaro p@55w0rd! /add
Then run the following command to add this username into the built-in admin group (Example below):
net localgroup administrators [USERNAME] /add
C:\windows\system32 net localgroup administrators A.gennaro /add
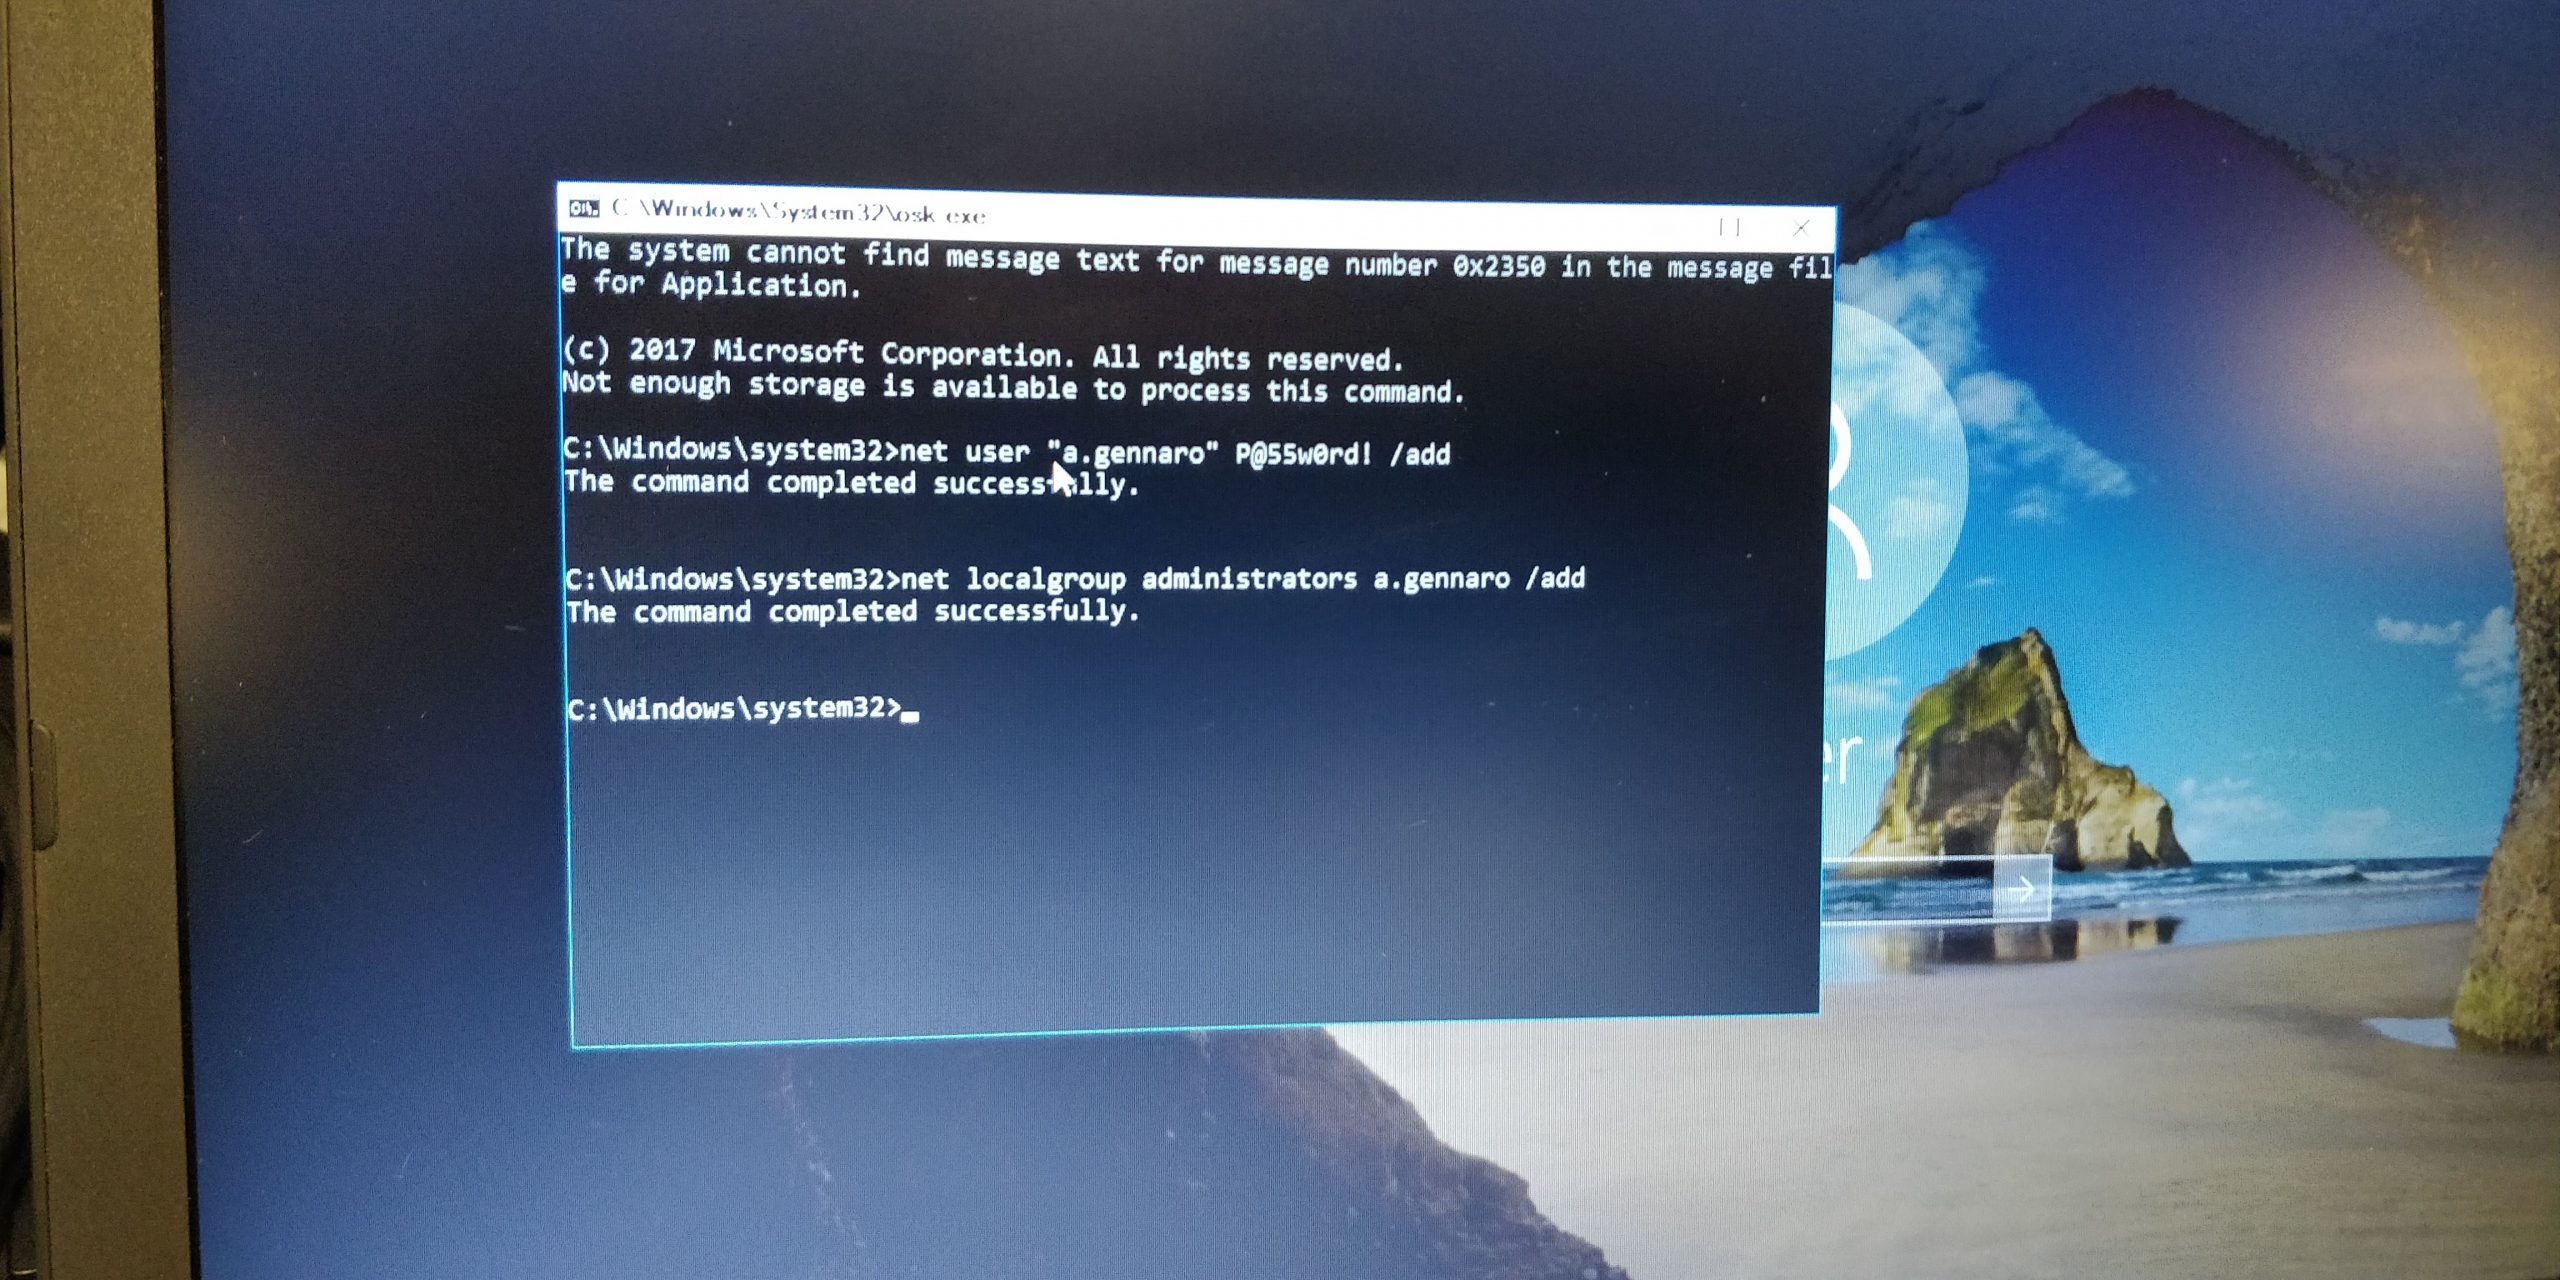
Your command prompt should look something like the below:
Exit out of the prompt and reboot the machine, the new user account should appear on the login screen! If you changed the password of an existing account, you will not need to reboot, you can log straight in.
Once your back in, we just need to reverse the change to osk.exe, so navigate back into Windows/System32. Find your osk.exe and rename this to cmd.exe, and then rename your osk.exe.old into osk.exe.
All done!
Prevention
So now we have broken in, lets talk about how we can prevent this. Main thing to note is an attacker will need to physically be at your machine to execute this kind of attack.
- One of the most common ways, is to set a password on your BIOS and UEFI and restrict the use of booting from physical media. Each motherboard is different, but most will let you do this. Of course, there is a way to reset the BIOS/UEFI passwords if an attacker has physical access to the machine, it still adds an extra step into the process which therefore requires additional time.
- Secure boot can be enabled on modern machine which only allows trusted software to boot. However this is more of an Enterprise/Business configuration more than a home configuration.
- As mentioned in the introduction, this method will not work if the drive is encrypted, so using Bitlocker or similar will prevent this. Just make sure to keep the recovery keys safe, on an external system or media.
Summary
Hopefully this guide helps if you have forgot your password or if you simply need to break into someones machine! There are other tools out there than can do the same as this, Hiren’s Boot CD 10 generally comes up as an alternative on a Google search, not to mention it is loaded with a number of different tools. There are also different variations of this, rather than using osk.exe you can use sethc.exe, as long as you replace an accessible application from the login screen with CMD you will be able to spawn a shell.
Thanks for reading!


